Rivet Brush Method
- Remove release liner and drape the whole panel on the surface.

- With a medium-hardness squeegee, firmly apply the film over the rivets and flat areas. The squeegee must pass over the rivets with firm pressure as if the rivets weren’t there.

- Continue squeegeeing the film over the rivets until the whole panel has been installed.

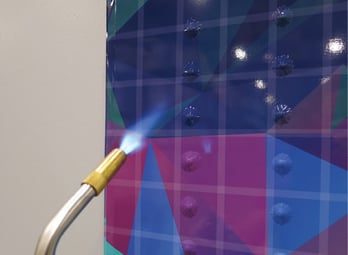
- To release the air trapped between the rivets and film, use a poking tool to create pinholes over the tented film.
- Needle Point Wheel


- Retractable Air Release Tool


- Multi-Pin Air Release Tool


5. Without heat, reduce the tenting (or halo) with a rivet brush spiraling inward on each rivet.

The set of rivets on the left have less tenting than the set on the right.

5. For a “painted on” appearance, each rivet has to be applied three times increasing the heat in each pass. For the first pass, apply a “kiss” of heat on a rivet.
TIP: Do not overheat the film. The film will be too soft and the rivet brush could catch the film and form wrinkles during application.
6. Apply firm pressure with a rivet brush in a circular motion. Repeat steps 6 and 7 increasing the amount of heat per rivet in each pass until all rivets are applied.
- Needle Point Wheel
Foam Pad Method
1. Remove release liner and drape the whole panel on the surface.

2. With a medium-hardness squeegee, firmly apply the film over the rivets and flat areas. The squeegee must pass over the rivets with firm pressure as if the rivets weren’t there.
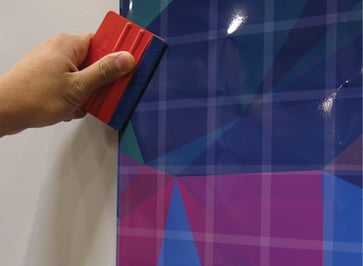
TIP: Use the squeegee drag method in the picture above to “close” the rivets in.
3. Continue squeegeeing the film over the rivets until the whole panel has been installed.
4. To release the air trapped between the rivets and film, use a poking tool to create pinholes over the tented film.
A. Needle Point Wheel

B. Retractable Air Release Tool

C. Multi-Pin Air Release Tool

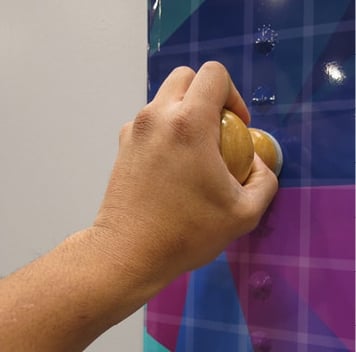
5. Without heat, reduce the tenting around the rivets by using a pad applicator on the rivets.

7. Apply firm pressure with the pad applicator and wiggle it in a circular motion. Repeat steps 6 and 7 until all rivets are applied.
Squeegee Method
1. Remove release liner and drape the whole panel on the surface.
2. With a medium-hardness squeegee, firmly apply the film over the rivets and flat areas. The squeegee must pass over the rivets with firm pressure as if the rivets weren’t there.
TIP: Use the squeegee drag method in the picture above to “close” the rivets in.
3. Continue squeegeeing the film over the rivets until the whole panel has been installed.
4. To release the air trapped between the rivets and film, use a poking tool to create pinholes over the tented film.
A. Needle Point Wheel
B. Retractable Air Release Tool
C. Multi-Pin Air Release Tool
5. Heat a section of film which covers 4-5 rivets. As you apply heat, the film will wrinkle but will flatten out once it reached its optimum temperature (180°F to 240°F).
6. Apply firm pressure with a hard squeegee (White) and go around the rivet. Repeat steps 5 and 6 until all rivets are applied.


TIP__51_-_How_to_Install_on_Rivets_-_Poke-Lance_Method